Table of Contents
This guide will provide an overview on FirstNet eSIM. I’ll show you how to activate, deactivate, convert & transfer FirstNet eSIM.

AT&T‘s FirstNet Service is a specialized communication network for first responders across the U.S., including government agencies and local organizations. The First Responder Network Authority, part of the U.S. Department of Commerce, is responsible for creating and operating this nationwide broadband network.
AT&T delivers this service under a contract to maintain a single, nationwide, and interoperable communication network dedicated to public safety when emergencies occur. It ensures first responders have a reliable means of communication to save lives and protect communities.
What is an eSIM?
An eSIM, also known as an embedded SIM, is a digital SIM that comes already built into a device’s hardware. It can be programmed with the details of a mobile network operator. eSIM for Android phones is super convenient! With eSIM, you don’t need to swap physical SIM cards when changing carriers or traveling. You can switch carriers or activate new plans right from your device. As Google Pixel 3a supports eSIM, you can experience all the benefits of eSIM on your device.
How to Check if Your Device Supports Firstnet eSIM
To check if your smartphone is compatible with Firstnet eSIM, you can follow this article.
If you are still unsure whether or not your device supports eSIM, you can contact the manufacturer or Firstnet for assistance.
How to Get an eSIM or eSIM Supported Device from FirstNet
You can purchase a FirstNet Ready device from your local AT&T retail store, online at Local Control, or by contacting your FirstNet sales representative.
How to Activate a FirstNet eSIM
eSIM activation process varies from brands to brands also it is slightly different in Android and iOS. Here is complete guide on how to set up and get started with FirstNet eSIM on popular phone brands.
iPhone
Setting up and activating an FirstNet eSIM on your iPhone is easy, especially if you purchased a carrier-connected iPhone from Apple or FirstNet. Here’s what you need to do:
If FirstNet eSIM was assigned when you bought your iPhone: Simply turn on your iPhone, and the instructions to activate your FirstNet eSIM will guide you through the setup process.
Switching to iPhone from another phone (e.g., Android): Contact Firstnet to transfer your phone number to your iPhone using eSIM Carrier Activation. They will provide you with a QR code to scan.
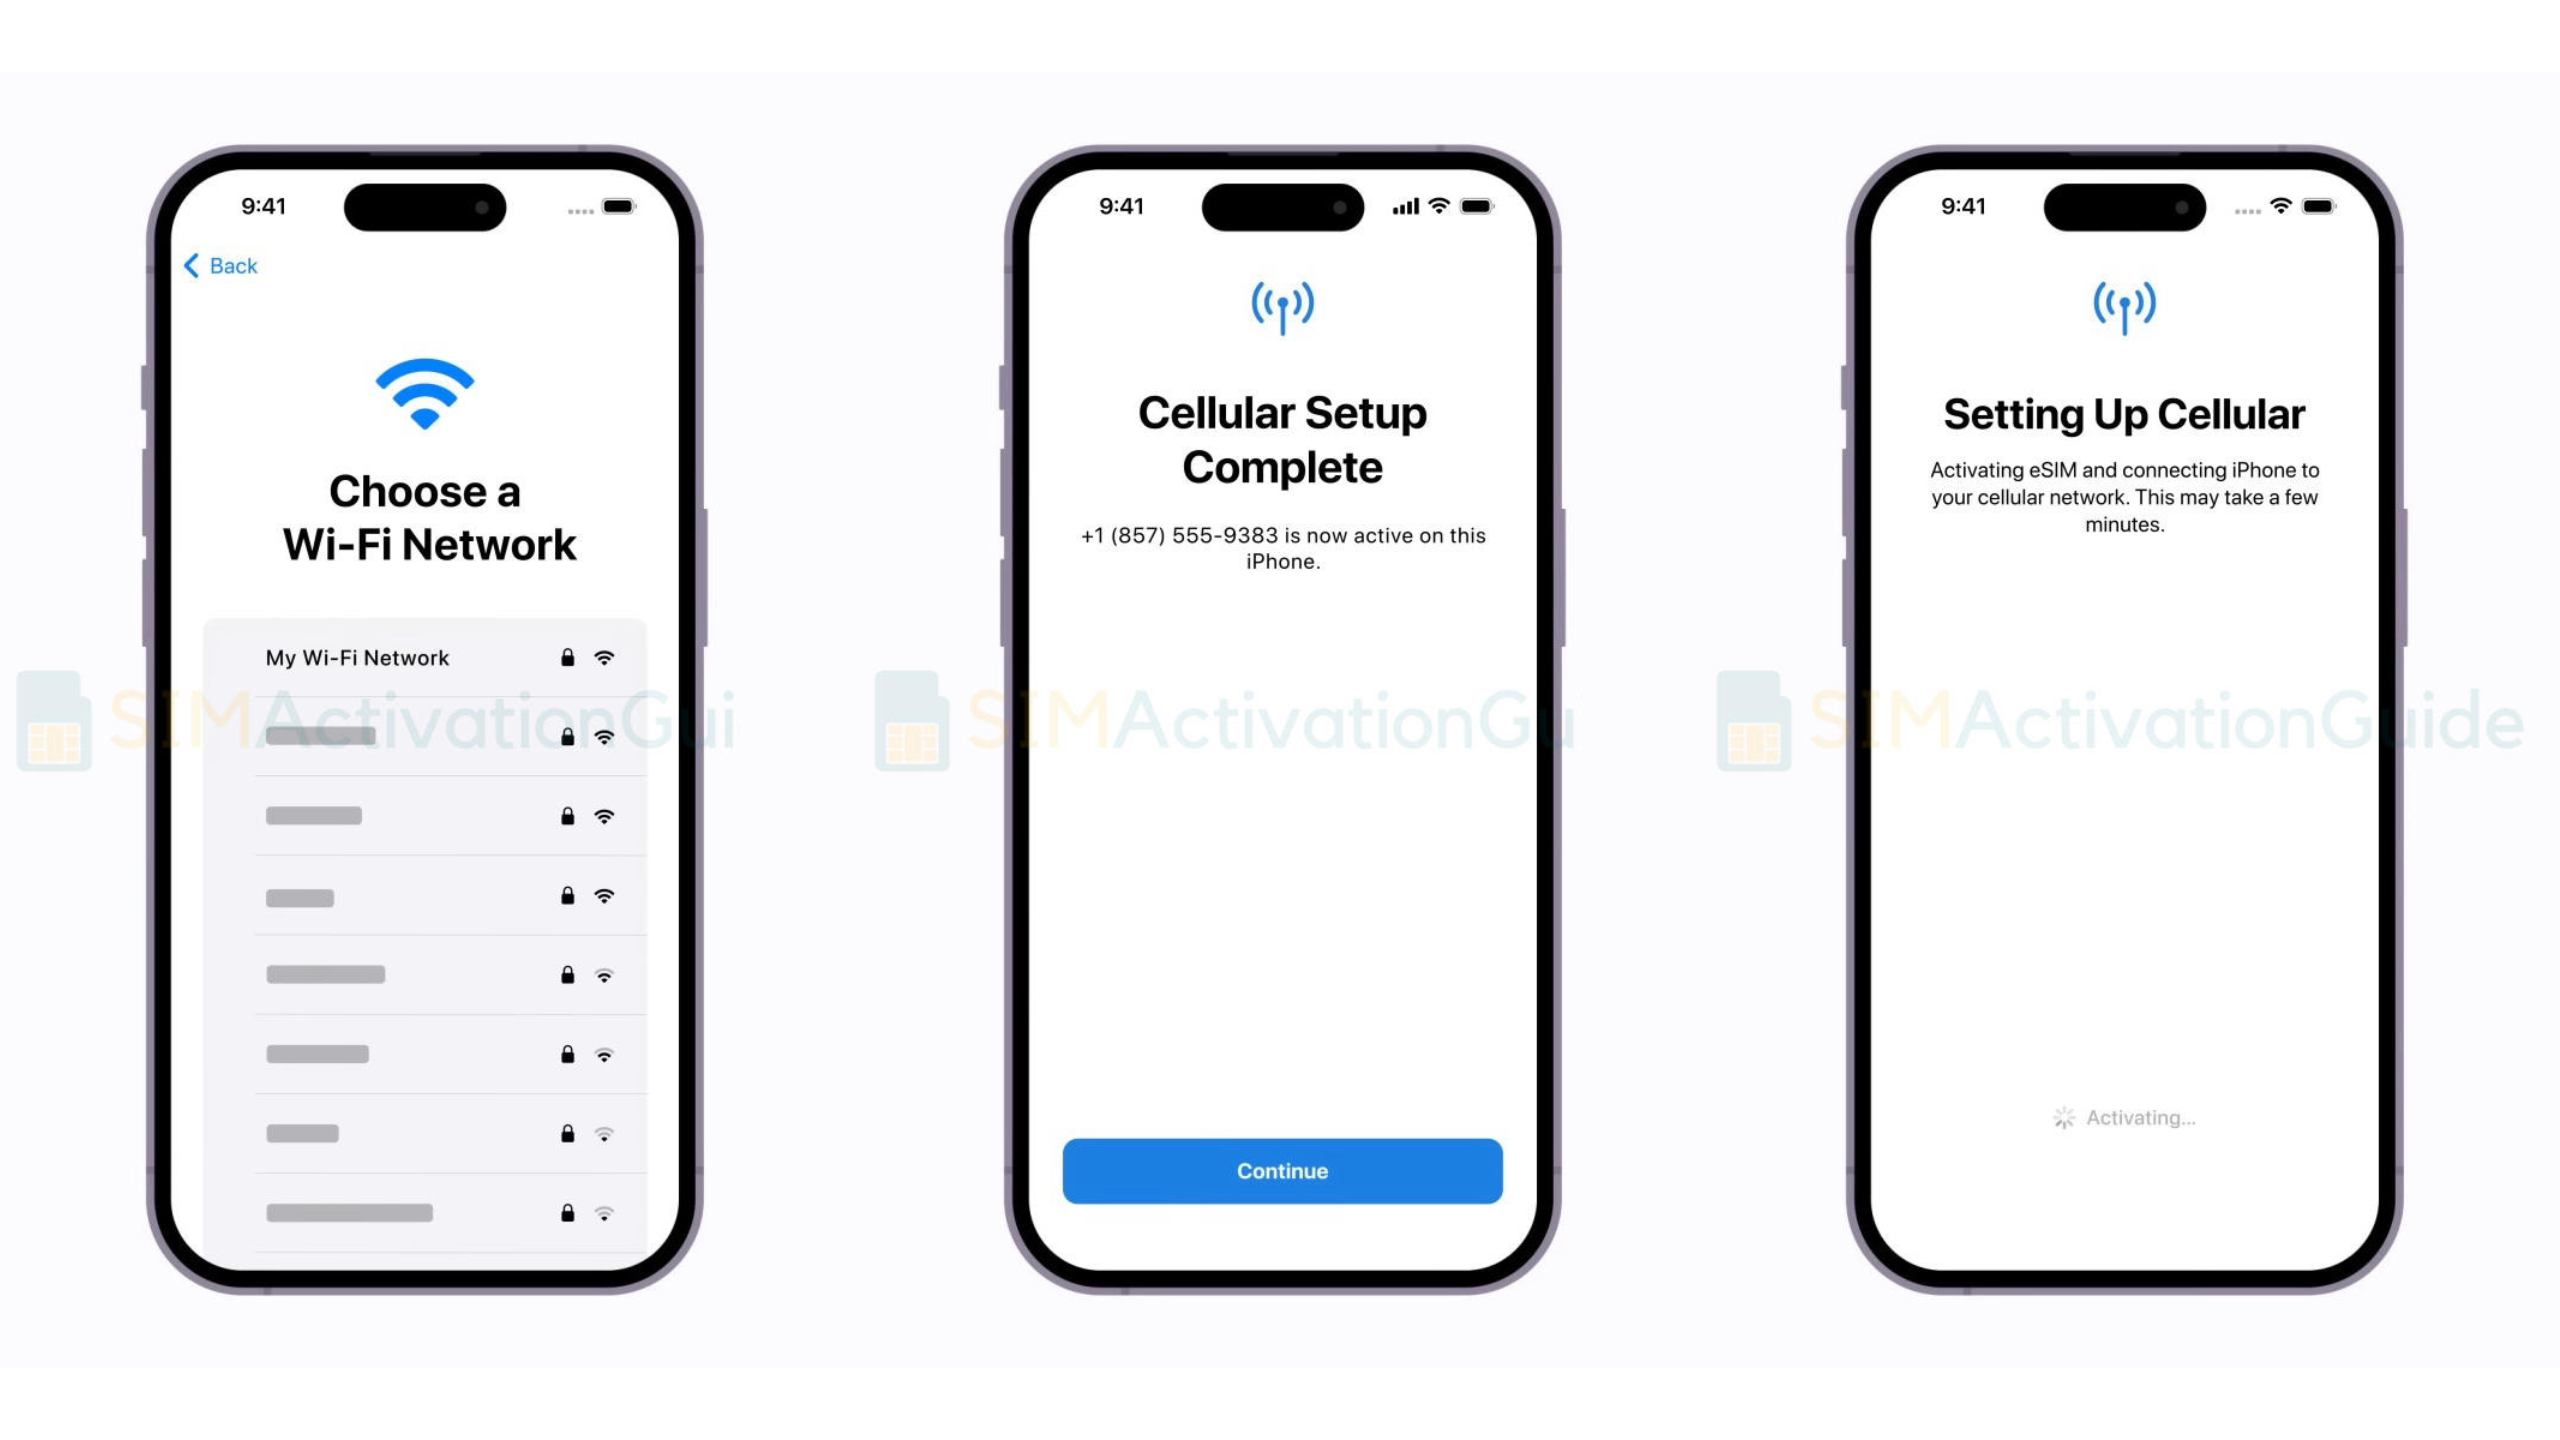
If you requested an Firstnet eSIM from your carrier after setting up your iPhone: Follow these steps:
- When you receive a notification that says “Carrier Cellular Plan Ready to Be Installed,” tap on it.
- Open the Settings app and go to “Carrier Cellular Plan Ready to Be Installed.”
- Tap “Continue” at the bottom of the screen to proceed with the setup.
- To check if your iPhone’s cellular connectivity is working, make a call. If you can’t make a call, get in touch with your carrier.
- If the eSIM plan replaces the one on your physical SIM, remove the physical SIM and restart your iPhone.
By following these steps, you can easily activate your Firstnet eSIM and enjoy the benefits of having a digital SIM card on your iPhone.
Google Pixel
To activate Firstnet eSIM on Google Pixel phones, follow this step by step tutorial:
1. Once connected to the internet via Wi-Fi, go to Settings > Network & internet > SIMs.
2. Click on “Download a SIM instead?” and proceed by clicking Next on the following screen.
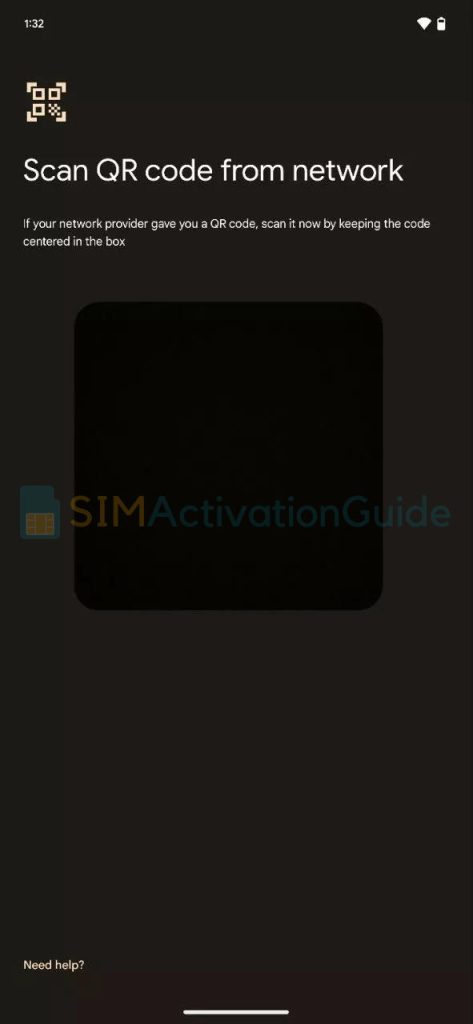
3. You’ll be prompted to scan the QR code from your network, as mentioned in the preparation steps. Simply scan the QR code and follow the instructions to activate the eSIM.
Samsung
To activate Firstnet eSIM on Samsung phones, follow this step by step tutorial:
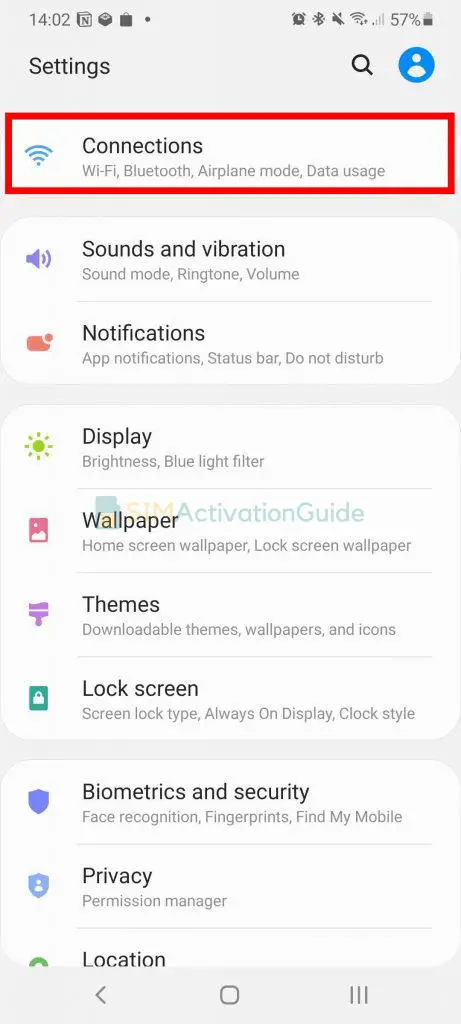
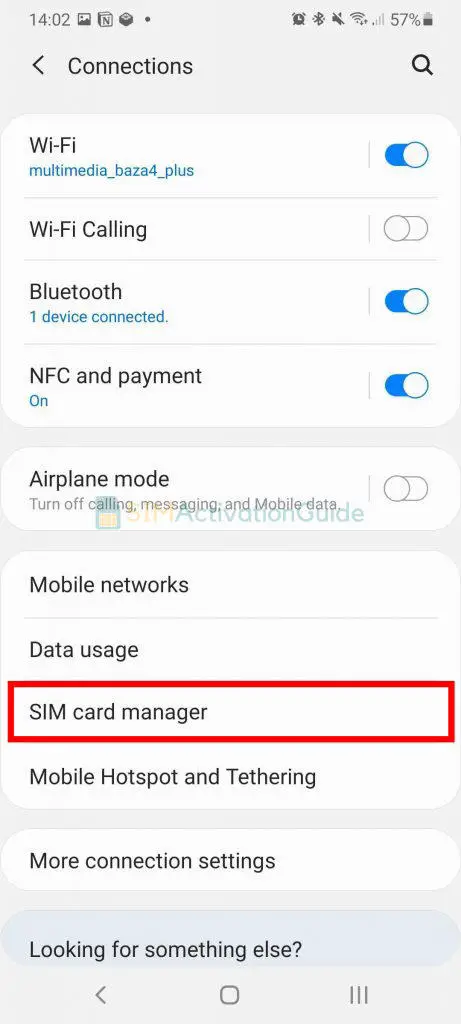
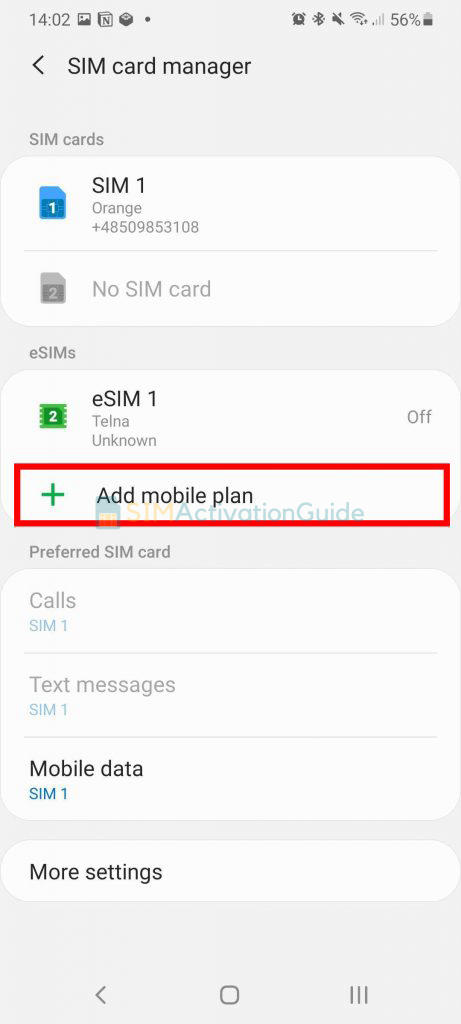
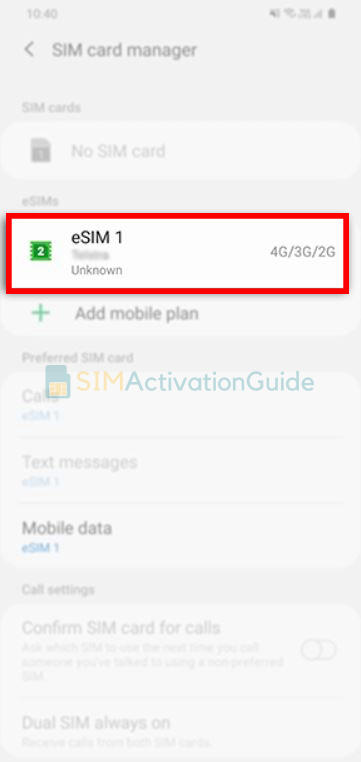
1. Navigate to your Settings and select Connections. Tap into the SIM card manager option.
2. Opt for ‘Add mobile plan‘. And choose ‘Scan Carrier QR code‘.

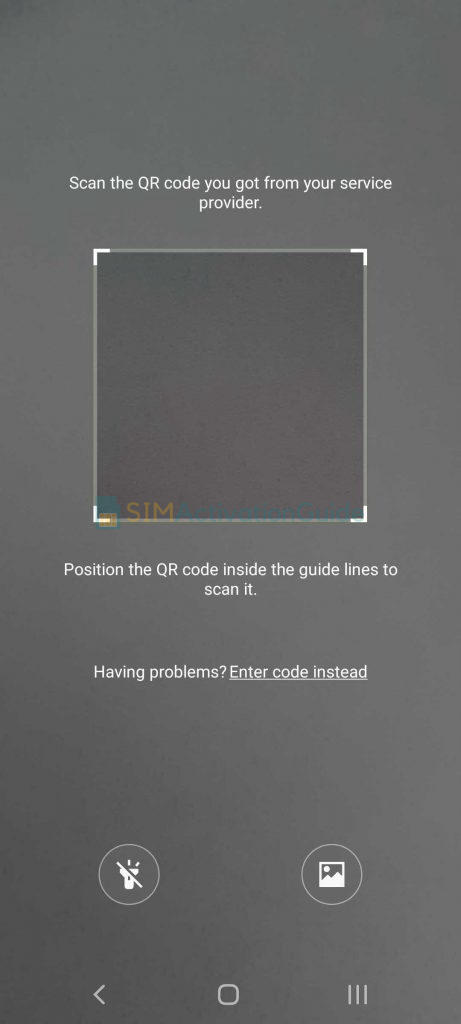
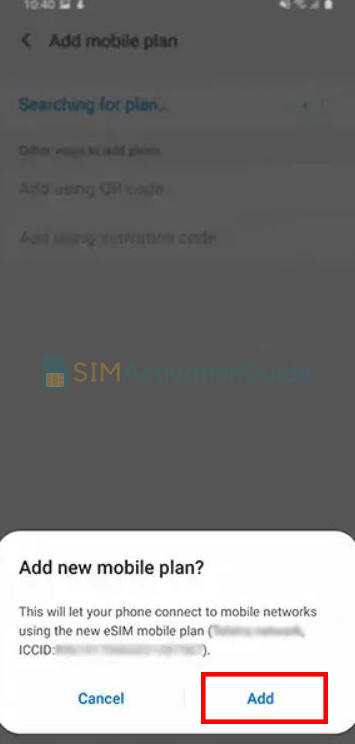
3. Align and scan the QR code within the guided lines, and if prompted, enter the confirmation code. As soon as the eSIM plan is detected, tap the Add button.
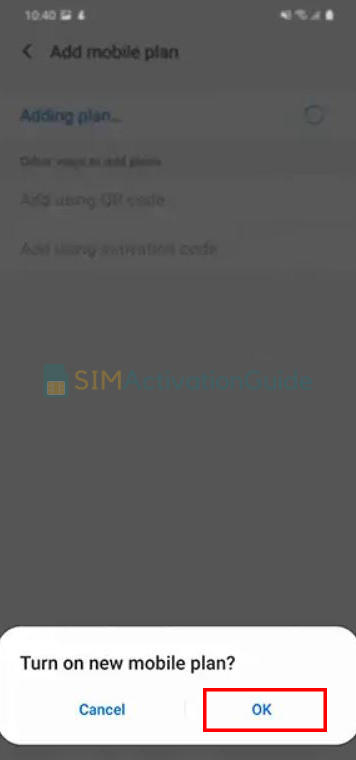
4. After registering your plan, confirm by selecting OK to activate it. To access it later, locate your eSIM in the SIM card manager. If necessary, set up an APN (access point name) – discover the details on your eSIM installation page.
How to Transfer an FirstNet eSIM from One Device to Another
To Transfer eSIM or Physical SIM to a BYOD iPhone, follow the steps below:
Before You Begin:
Make sure you have the following Apple iPhones:
- Source device: iPhone 11 or newer. This is your previous iPhone with an active line.
- Target device: iPhone 12 or newer. This is the BYOD iPhone you want to transfer the eSIM or physical SIM to.
Ensure that the BYOD device is unlocked for dual SIM functionality. Here are the unlocking details:
- iPhones purchased directly from Apple are always unlocked.
Ensure that both devices:
- Are updated to iOS 15.6 or higher.
- Are signed into the same iCloud account with two-factor authentication enabled.
- Have the screen passcode enabled.
- Are connected to Wi-Fi.
- Are charged and kept close together during the SIM/eSIM transfers.
Now, let’s get started:
- On your BYOD (target) iPhone, navigate to “Settings” > “Cellular.”
- If “Add eSIM” is available, tap it. If not, tap “Set Up Cellular.”
- On the “Choose a Phone Number” screen, tap the desired line you want to transfer, then tap “Continue.” If the line isn’t supported, it will be grayed out and show “Transfer Not Supported.”
- When the “Transfer your SIM to this iPhone” prompt appears, tap “Transfer Number.”
- When the “Confirm Transfer on Your Other iPhone” prompt appears, on your previous (source) iPhone, review the prompt, then tap “Transfer SIM.”
- To confirm the transfer, double click the side button on your previous (source) iPhone.
- On the “Add Cellular Plan” screen on your BYOD (target) iPhone, tap “Continue.”
- If necessary, do the following:
- Choose a label for each of your cellular plans, then tap “Continue.”
- Select a default line, then tap “Continue.”
- On the “iMessage & FaceTime” screen, select the desired line, then tap “Continue.”
- Select the default line for cellular data, then tap “Done.”
- Tap the “Allow Cellular Data Switching” switch to turn it on.
- On the “Cellular Setup Complete” screen, tap “Done.”
- After your BYOD (target) iPhone displays the ‘iPhone is activated‘ prompt, restart your iPhone.
How to Convert an Firstnet Physical SIM to eSIM
To transfer an FirstNet physical SIM to eSIM, you can follow these steps:
1. On your iPhone, go to Settings > Cellular.

2. Tap “Convert to eSIM“.
*If you don’t see “Convert to eSIM,” then contact FirstNet customer service to move your phone number from your physical SIM to an eSIM using eSIM Carrier Activation or by scanning a QR code.
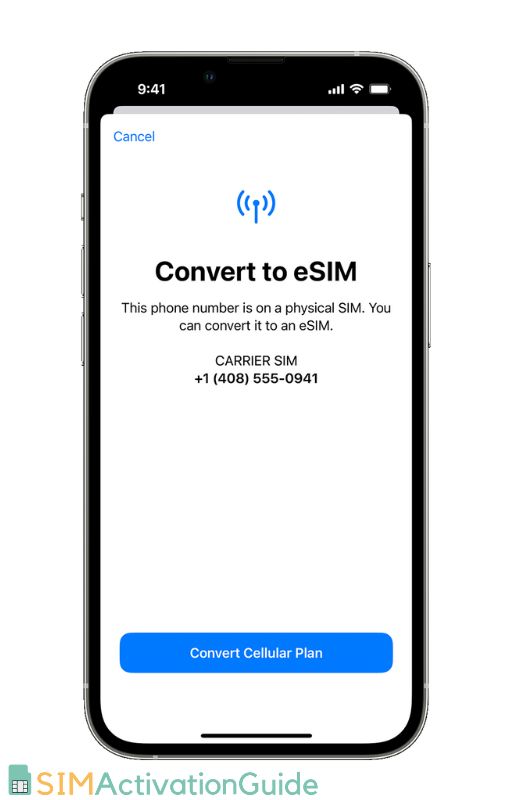
3. Tap “Convert Cellular Plan” and then “Convert to eSIM.”
4. Wait for your eSIM to activate. Your previous SIM card will be deactivated once the eSIM is active.
5. Remove the physical SIM from your iPhone and restart it.
Once the conversion is complete, your physical SIM card will be deactivated and you will be able to
How to Deactivate an Firstnet eSIM
To delete an Firstnet eSIM, you can follow these steps:
- Go to your device’s cellular settings.
- Tap on “eSIM” or “Mobile Network Plans“.
- Tap on the eSIM profile that you want to deactivate.
- Tap on “Delete eSIM“.
- Confirm that you want to delete the eSIM profile.
I hope, this guide helped you to get your desired information about FirstNet eSIM service. If you still have enquiries or face any problem, please comment below.