Table of Contents
Circles.Life offers flexible mobile plans in Singapore, and their eSIM makes connecting even easier! This guide details how to get and activate your new Circles.Life eSIM step-by-step. From choosing plans to converting a physical SIM to eSIM, this guide covers everything you need to know about Circles.Life eSIM.
Circles.Life eSIM Plans
Price reverts to $25/mo after 3 months
FREE 2GB Roaming forever (Malaysia, Indonesia, Thailand, Taiwan, Bangladesh, Hong Kong, Macau & Sri Lanka
Free Unlimited Incoming Calls
300 Mins Local (SG) Outgoing Talktime
Free Caller ID
Price revert to $17 after 3 months
FREE 1GB Roaming forever (Malaysia, Indonesia, Thailand, Taiwan, Bangladesh, Hong Kong, Macau & Sri Lanka
Free Unlimited Incoming Calls
300 mins Local (SG) Outgoing Talktime
Free Caller ID
Use data across Singapore and 8 popular Asian countries (Malaysia, Indonesia, Thailand, Taiwan, Bangladesh, Hong Kong, Macau & Sri Lanka)
300 Mins Local (SG) Talktime
Free Incoming Local and Roaming SMS
Free Caller ID
300 Mins Outgoing Talktime
Unlimited Incoming Calls
How to Get Started with Circles.Life eSIM
To begin, the first step is to check if your phone supports eSIM. For guidance on this, refer to the article: ‘How to Check if My Phone Supports eSIM‘. You can also see the full list of compatible devices with Circles.Life eSIM here.
Note: Circles.Life eSIM is not available for Apple Watch at the moment.
If you have an eSIM compatible device, then follow the steps below to get started with Circles.Life eSIM:
- Select a plan: Choose from 5G Starter (eSIM), 4G Standard (eSIM), or 4G Upsize (eSIM).
- Register: Complete the registration process for your chosen plan.
- Receive QR code: An activation QR code will be sent to your email address.
- Scan QR code: Use your device’s camera to scan the QR code to activate your eSIM.
How to Scan QR Code & Activate Circles.Life eSIM
After you choose your Circles.Life eSIM plan, they’ll email you a QR code within 10 minutes. On your phone, go to settings and find the option to add a cellular plan. Scan the QR code to activate your eSIM. Once done, you can choose to make it your main or secondary line.
How to set up eSIM for various phones:
iPhone
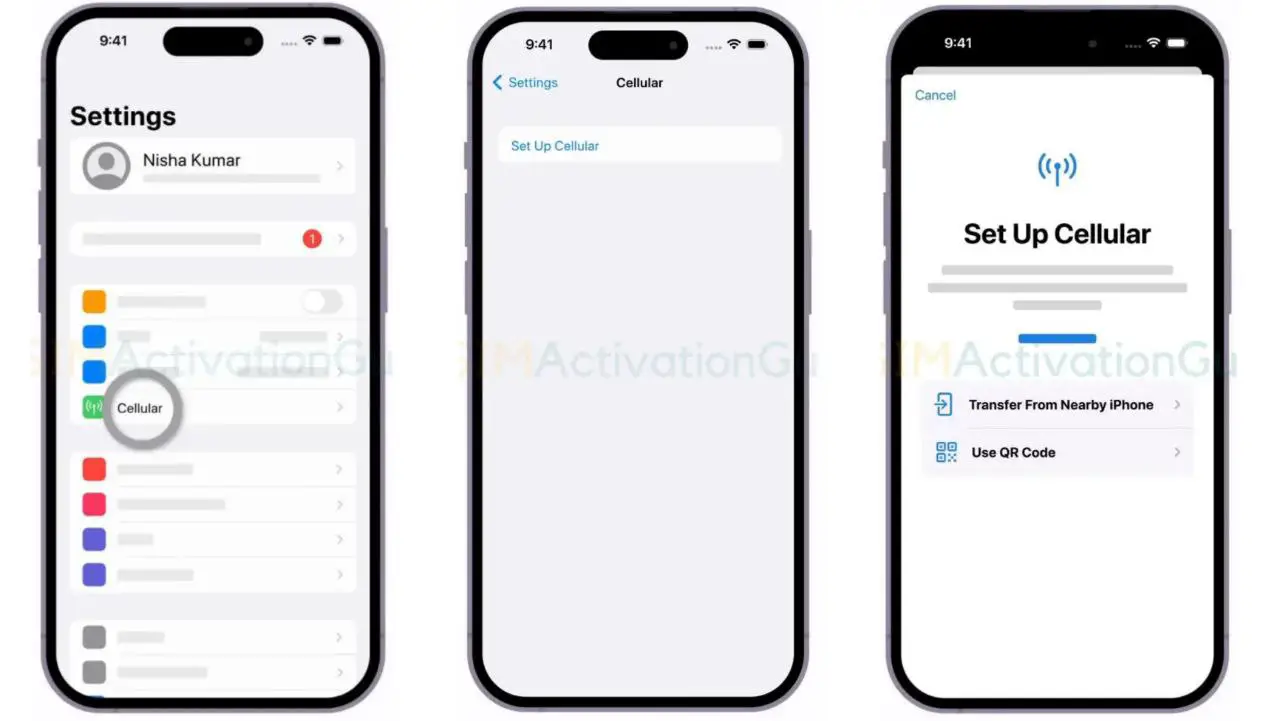
- Open the “Settings” app on your iPhone.
- Tap on “Cellular” or “Mobile Data” (depending on your iOS version).
- Tap “Add Cellular Plan“.
- Choose “Scan QR Code“.
- To scan the QR code, point your iPhone camera at the code until it’s recognized.
- Then, follow any additional on-screen instructions provided by your phone.
Android
- Samsung: Settings > Connections > SIM Card Manager > Add Mobile Plan > Activate Using QR Code
- Google Pixel: Settings > Network & Internet > Mobile Network > Advanced > Carrier > Add Carrier
For step-by-step guide on android eSIM activation, follow this guide: “How to Install, Activate and Use eSIM on Android Devices“.
After successful activation, choose whether to use the eSIM as your primary or secondary line.
How to Convert Circles.Life pSIM to eSIM
If you already have a Circles.Life physical SIM and want to upgrade to eSIM, it’s easy!
Here’s how to switch from a physical SIM to an eSIM with Circles.Life:
- Make sure your device is eSIM-compatible.
- Open the Circles.Life app.
- Navigate to “Manage Order“.
- Click “Switch to eSIM“.
- Remember, your physical SIM will be deactivated immediately upon requesting an eSIM.
- You’ll receive an email with an eSIM QR code and confirmation of activation.
- Activate Your eSIM, follow the steps mentioned in the previous section.
Related Guides:
Frequently Asked Questions
Q: Does Circles.Life support/have/offer eSIM?
A: Yes, Circles.Life supports eSIM for eSIM-compatible devices.
That’s all you need to do to get started with your Circles.Life eSIM! Enjoy the convenience of eSIM connectivity.