Table of Contents
Discover the ease of Vodafone Australia’s eSIM! This guide shows you the process of getting and activating your eSIM, from choosing plans to hassle-free setup.
Vodafone Australia, a leading telecommunications provider in the country, supports eSIM technology for devices that are compatible with this innovative feature. They typically offers eSIM plans for both prepaid and postpaid customers.
Is your Device Compatible with Vodafone eSIM?
To begin, the first step is to check if your phone supports eSIM. For guidance on this, refer to the article: ‘How to Check if My Phone Supports eSIM‘.
You can also check out the list of eSIM compatible devices by Vodafone: ‘Vodafone eSIM Compatible Devices‘.
Vodafone eSIM Plans
NumberSync is Vodafone’s eSIM option designed for 4G-ready Apple Watches and Samsung wearables. To set up NumberSync, you must be on a postpaid Vodafone plan. The cost for NumberSync is $5 per month.
Prepaid eSIM Offers
Here are Vodafone’s prepaid plans with eSIM:
| Plan | Data | Validity | Price |
|---|---|---|---|
| $30 Prepaid Plus Recharge | 15GB | Per 28 Day Renewal | $30 |
| $40 Prepaid Plus Recharge | 30GB | Per 28 Day Renewal | $40 |
| $50 Prepaid Plus Recharge | 45GB | Per 28 Day Renewal | $50 |
| $60 Prepaid Plus Recharge | 60GB | Per 28 Day Renewal | $60 |
Postpaid eSIM Offers
Here are Vodafone’s postpaid SIM-only plans with eSIM:
| Plan | Data | Price/Month | Purchase |
|---|---|---|---|
| $45 Small SIM Only Plan | 40GB | $45 | Here |
| $55 Medium SIM Only Plan | 150GB | $50 | Here |
| $65 Large SIM Only Plan | 300GB | $60 | Here |
After selecting your desired plan, you have the option to obtain a Vodafone eSIM by visiting a Vodafone store or by using their convenient website or app.
Related Articles:
How to Activate Vodafone eSIM
In general, most smartphones follow similar steps for installing and activating eSIM, and Vodafone’s process is no exception. Steps may vary depending on the operating system and model of your device. Here are the methods:
Activation on Apple Devices
Here are the steps to set up your Vodafone eSIM during and after the device setup:
During setup:
- When prompted to ‘Choose A Data Plan’ during your device setup, select ‘Vodafone AU’ and press ‘Continue’.
- Follow the steps to set up iCloud and Apple services.
- When you see the ‘Welcome to iPhone’ screen, swipe up to get started. Your plan will now be ready to use.
After setup via push notification:
- After finishing the device setup, you will receive a push notification titled ‘Vodafone AU Mobile Plan Ready to be Installed.’
- Open the notification on your Home screen.
- Press ‘Continue’ to proceed. Go to Settings and choose ‘Mobile’. Your plan will now be ready to use.
After setup via settings:
- Open ‘Settings‘.
- If you receive a push notification, open it and press ‘Continue’. Otherwise, choose ‘Mobile’ directly from Settings.
- Your plan will now be ready to use.
Activation on Samsung Devices
After setup via push notification:
- After finishing the device setup, Vodafone will send a push notification titled ‘Add new mobile plan.’
- Swipe down from the top of your Home screen and tap on the notification.
- Select ‘Add Mobile plan’. When asked to ‘Add this plan to your phone?’, press ‘Confirm’. Your plan is now ready to use.
After setup via settings:
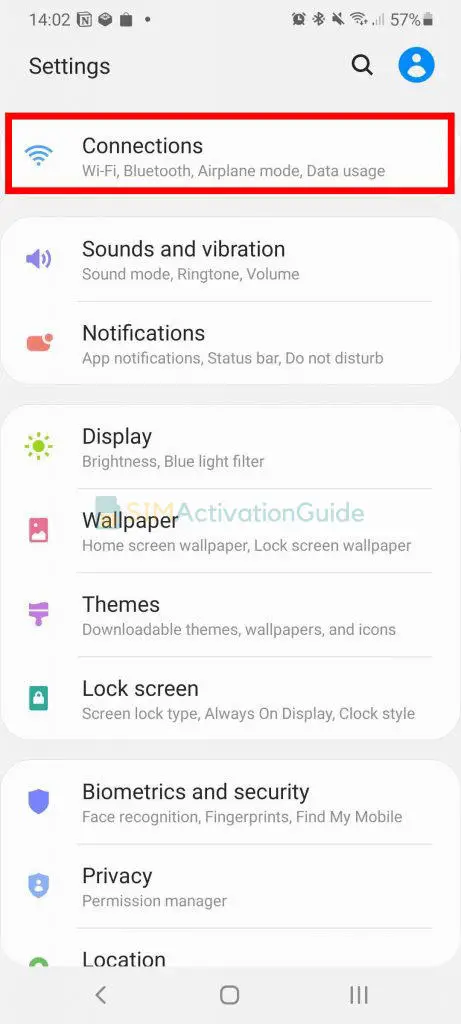
- Go to ‘Settings’.
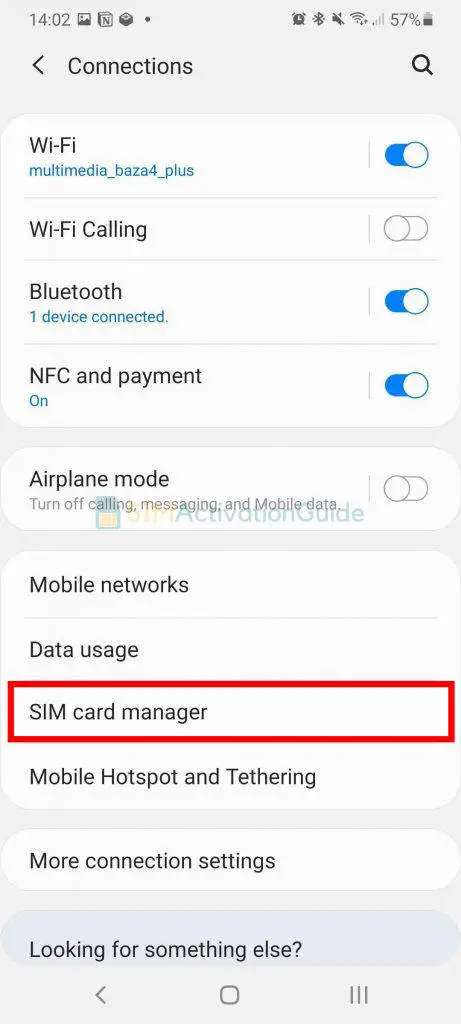
- Choose ‘Connections’, then ‘SIM card manager’.
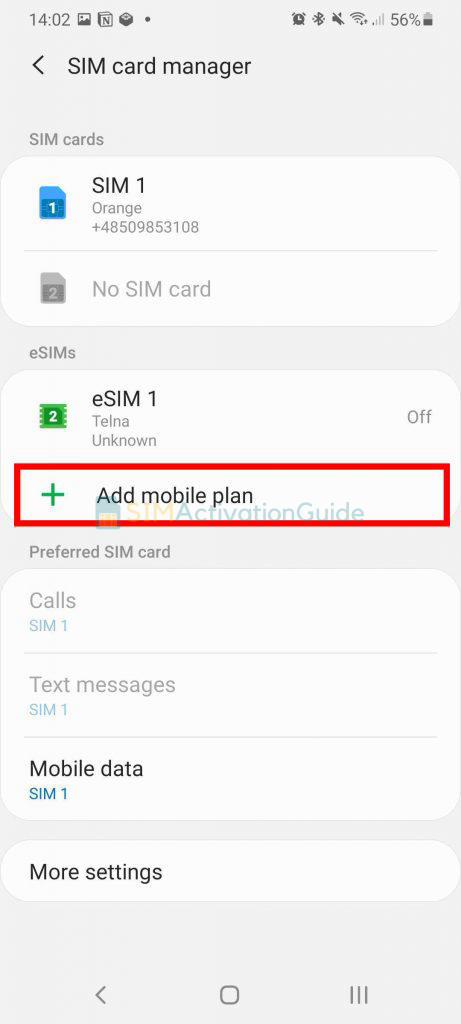
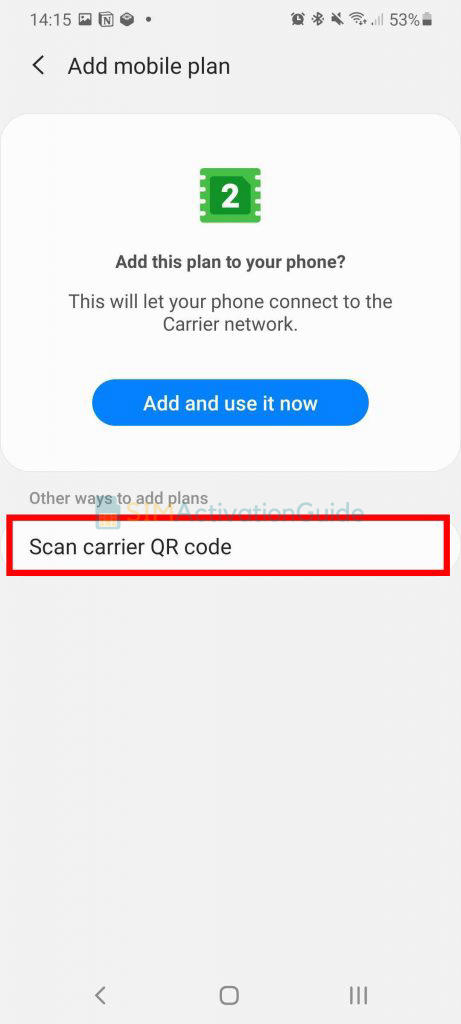
- Select ‘Add Mobile plan’. When asked to ‘Add this plan to your phone?’, press ‘Confirm’. Your plan is now ready to use.
Activation on Google Phones
During setup:
- During your device setup, when asked to ‘Connect to mobile network’, choose ‘Download a SIM instead?’ and press ‘Next’.
- Follow the steps to connect to WiFi. When the ‘Use Vodafone AU?’ screen appears, press ‘Activate’.
- Once you see ‘Vodafone AU is active’, press ‘Next’. Follow the prompts to continue setting up your Google account and apps. Once done, your plan will now be ready to use.
After setup via push notification:
- Once you’ve finished setting up your device, Vodafone will send a push notification titled ‘Finish setting up your Pixel’. Swipe down from the top of your Home screen and tap on the notification.
- Press ‘Start’.
- When asked to ‘Connect to mobile network’, choose ‘Download a SIM instead?‘ and press ‘Next’.
- When the ‘Use Vodafone AU?’ screen appears, press ‘Activate’.
- Once you see ‘Vodafone AU is active’, press ‘Next’. Follow the prompts to continue setting up your Google account and apps. Once done, your plan will now be ready to use.
After setup via settings:
- Go to ‘Settings’.
- Choose ‘Network & internet’ and press ‘SIMs’.
- Choose ‘Download a SIM instead?’.
- On the ‘Download your SIM’ screen, press ‘Next’.
- In the pop-up ‘Your SIM will be downloaded soon’, press ‘OK’.
- When the ‘Use Vodafone AU?’ screen appears, press ‘Download’.
- Once you see ‘Download Finished’, press ‘Settings’.
- Tap on the ‘Use SIM’ toggle to turn it on and then ‘Yes’ in the pop-up. Once done, your plan will now be ready to use.
Activation on Oppo Phones
Here are the steps to set up your Vodafone eSIM during and after the device setup on an OPPO phone:
During setup:
- During your device setup, when asked to ‘Connect to a mobile network’, choose ‘Use eSIM’.
- On the ‘Download your eSIM‘ screen, press ‘Next’.
- Follow the steps to connect to WiFi. When the ‘Use Vodafone AU?’ screen appears, press ‘Download’.
- Once you see ‘Download finished’, press ‘Settings’. Choose ‘eSIM’.
- Tap on the 3 dots on the right-hand corner of the screen and choose ‘Enable’.
- When asked ‘Enable Vodafone AU?’, choose ‘Yes’. Once done, your plan is now ready to use.
After setup via push notification:
- Once you’ve finished setting up your device, Vodafone will send a push notification titled ‘Finish setting up your OPPO’.
- Swipe down from the top of your Home screen and tap on the notification. Press ‘Start’.
- When asked to ‘Connect to a mobile network’, choose ‘Download a SIM instead?‘
- On the ‘Download your SIM’ screen, press ‘Next’.
- When the ‘Use Vodafone AU?’ screen appears, press ‘Activate’.
- Once you see ‘Vodafone AU is active’, press ‘Next’.
- Follow the prompts to continue setting up your device and apps. Once done, your plan is now ready to use.
After setup via settings:
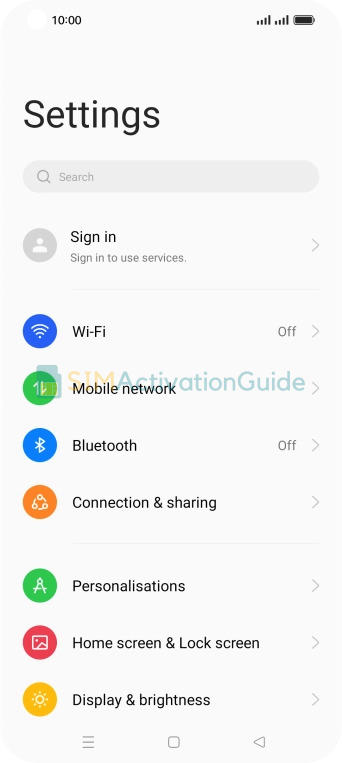
- Go to ‘Settings’.
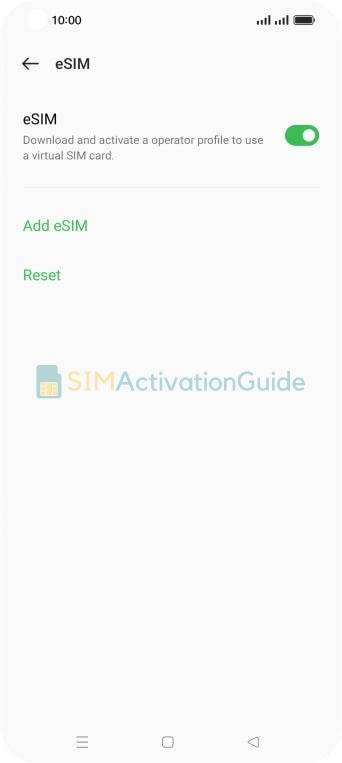
- Choose ‘Mobile network’ and press ‘eSIM’, then ‘Add’.
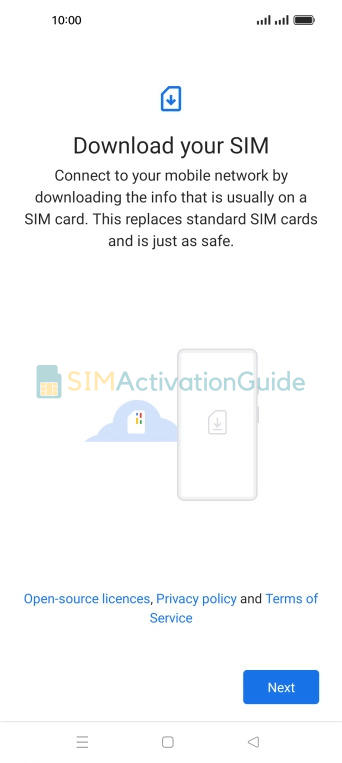
- On the ‘Download your SIM’ screen, press ‘Next’.
- When the ‘Use Vodafone AU?’ screen appears, press ‘Download’.
- Once you see ‘Download finished’, press ‘Settings’. Choose ‘eSIM’.
- Tap on the 3 dots on the right-hand corner of the screen and choose ‘Enable’.
- When asked ‘Enable Vodafone AU?’, choose ‘Yes’. Once done, your plan is now ready to use.

That’s it! Your Vodafone eSIM should be up and running. If you have any further questions or need additional information, feel free to comment below.